When it comes to woodworking, the finishing touches are often the most important. After all, what’s a beautiful walnut table without a good-looking finish? Luckily, with proper wood finishing techniques, you can add that perfect touch to any project and make it look very professional.
The following guide will give you all the wood finishing tips and tricks you need to take your projects from good to great!
We will be discussing:
Wood finishing is the process of modifying or enhancing the surface of wood material in order to protect it or improve its appearance. Finishing wood is essential for those wanting to make furniture, cabinetry, crafts, and other wood-related projects that look professional.
There are a variety of different finishes available when it comes to woodworking. From protective sealants and stains to lacquer sprays, the options can be overwhelming. However, understanding the different types of finishes and how they work will help you decide which one is best for your project.
The three main types of wood finishes are:
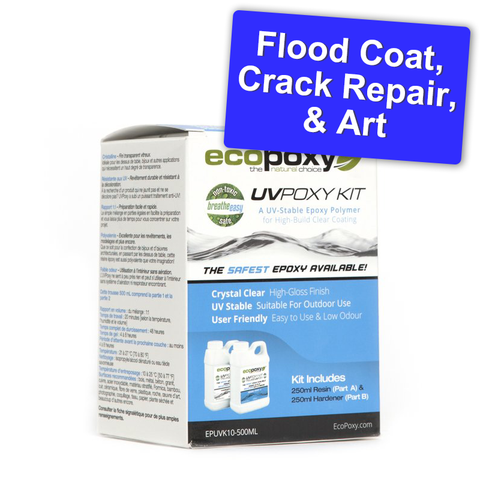
These are sealants that protect the wood without changing its color. They can be either natural or synthetic, and come in a variety of finishes, such as glossy, matte, or satin.
These are pigmented solutions that change the color of wood and can be used to achieve a wide range of shades. They’re also available in different types, from oil-based stains to water-soluble ones.
These are usually spray-on finishes that dry quickly and provide a glossy shine. They are great for adding pop to furniture or other projects but must be applied with proper care in order to achieve the desired results.
Before you start any wood finishing project, it is important to properly prepare the surface of the wood. This includes sanding it down, cleaning off any dust particles, and making sure there are no rough edges. Doing this will ensure that your finish looks even and professional when applied. Having two light sources is a great way to ensure that you don't miss any spots during the sanding process!
Once you’ve prepared the surface of your wood, it’s time to apply wood finishing products of your choosing in order to protect it from the elements and enhance its appearance.
Here at KJP Select Hardwoods, we use two natural wood finishes for our custom tabletops. We love working with Rubio Monocoat and Osmo. Each product has different application methods, so we encourage you to browse those products for step-by-step instructions on how to finish wood projects.
Our favourite application method is to use a spreader. Other popular applicators would be a brush, roller, or sprayer. It is very important to ensure that each layer dries completely before applying an additional coat.Once you’ve applied the finish of your choice, it’s time to add some final touches. This can include polishing or waxing the surface for added protection and shine, as well as buffing out any imperfections that may have appeared during application.
If you want to achieve professional-looking results with your wood finishing projects, there are a few extra steps you can take. Start by sealing off your work area by taping off any surfaces nearby that could be affected by the finish. This will help prevent any mistakes from being made and keep your projects looking neat.
When it comes to application, use quality tools and products for best results. Investing in good brushes, sprayers, and other wood finishing equipment may cost more upfront, but it will save you time (and money) down the line when it comes to getting a smooth, even finish on your projects.
Finally, don’t rush! Take your time during each step of the finishing process and make sure that each layer is completely dry before moving on to the next one. This will ensure that your finished product looks as professional as possible.
Pun intended.
]]>Live edge refers to the natural, curved edge of a tree trunk or branch that is normally removed when a log is milled into lumber. Maintaining the live edge has become increasingly popular over the last decade. Woodworkers around the world covet this material for their building projects. The expression “no two pieces are ever the same” is actually inaccurate when it comes to live edge wood! When a log is cut into slices, it is called a flitch. When two sequential slabs are put side by side, they are mirror images of each other. This is a very popular technique called book matching which we will chat about later on.
When purchasing live edge wood, generally speaking, the cheaper options are still drying and are unprocessed. By ensuring your wood has been properly dried, you give your project the best possible chance for success, and you can use it almost immediately. Wood movement is real! Perhaps we'll go into more detail on that topic in a future blog post.
Now that you know what live edge wood is, let’s chat about finishing live edge wood.
Ensure your live edge slab has been properly dried and is flat. The majority of the live edge wood slabs sold at KJP Select Hardwoods come pre-flattened, so it's rarely something you need to worry about. It should be noted that all of our slabs have also been properly kiln-dried. If your slab does need flattening, you can do so by using a tool such as the Woodpeckers Slab Flattening Mill Pro. Alternatively we offer a flattening service with a very quick turnaround.
We recommend removing the bark. Chances are it will fall off naturally if you try to keep it on, so you might as well remove it now and clean up the edge. This can be done using a sharp chisel. Slowly and delicately, peel off section by section. You'll likely find this process quite satisfying!
The live edge of a slab is most commonly positioned on the outside portion of the project. This is commonly seen in tabletops and charcuterie boards. That being said, an increasingly popular project is creating an epoxy river table. You essentially put slabs into a mold with the live edge portions in the interior of the project and then fill the empty space with coloured epoxy. Either way, the finishing process is the same. Below are a couple of examples displaying different ways of showcasing live edge wood. You can browse for more inspiration on our Epoxy Resin / River Tables page.
The first step to finishing a live edge slab is sanding. Start by softening the edges prior to sanding the live edge slab. If the live edge is particularly rough, you can use a grinder to speed up the process. Give the sides an excellent sand, ensuring that there are no sharp edges. No one wants to ruin their clothing on the side of a live edge table! Then you'll want to grab an orbital sander such as a Festool ETS EC 150 (the powerhouse choice in our workshop) and really take your time sanding the top surface of your live edge slab. You'll generally begin the process at 80 or 120 grit and work your way up to 220.
If you've chosen to keep the bark on, you'll want to seal the live edge. Start by vacuuming the edges to try and remove as many loose pieces as possible. Using a clean brush, you can apply epoxy to the edges to help adhere the bark to the slab. This won't guarantee that the bark will stay on, but it's your best bet. We would recommend UVPoxy for this step.
Using an oil finish like Rubio Monocoat Pure, you can seal and finish the wood in just one coat per side. It couldn't be easier! Using an oil applicator, apply one coat on the top surface and use a lint-free rag on the live edges. Wipe off any excess within 15 minutes. After it has dried, apply a coat on the bottom surface of your project. Wait for it to cure, and voila. You have just finished your live edge wood project!
Frequently asked Questions About Finishing Live Edge Wood
That is where the concept of book matching comes into play. By laminating sequential slabs from a flitch together, you will create the illusion of a one-piece tabletop. For a cheaper alternative, you can also split a live edge slab and laminate matching or complimentary boards of lumber in the middle. We have a helpful video on our TikTok channel chatting about that topic.
We would love to help! Take a browse at our Live Edge Table section for more information.
Walnut, Ambrosia Maple, and White Oak seem to be trending these last few years. They are all timeless and elegant choices. At KJP Select Hardwoods, we have a wide variety of slabs ready to ship to your doorstep!
Now that you have the knowledge of how to finish live edge wood, you’re ready to tackle your next project with confidence. Let us help! We have an assortment of wood finishing products for every application. Finish your live edge slab with the best finishes and techniques in the industry.
]]>In this article, we take a look at the qualities of mahogany that influence the kinds of finishes you’ll want to use, the different products you can use to finish mahogany, and a couple of simple techniques you can use to create a beautiful mahogany piece.
There are two key things to keep in mind when working with mahogany: Preserving (and accentuating) its natural colour and grain and ensuring that you can even out the uneven surface created by the open grain. The techniques we’ll describe below will allow you to do both, letting the natural beauty of your mahogany shine through, all while creating functional, long-lasting pieces.
Mahogany’s porous, durable nature makes it a great choice for any number of different finishing products and techniques. Finishing products you can use on mahogany include:
You may want to avoid certain types of stains. Gel stains, for example, can obscure the grain of your piece. Mahogany’s striking open grain is one of the best things about it, so we’d recommend avoiding gel stains - but it’s up to you!
While mahogany is fairly forgiving, your standard finishing rules apply. Sand your lumber down to about 180-220 grit. Be sure to work in a well-ventilated room when using chemical finishes, and wear a respirator when you’re sanding.
Now that we’ve got the basics out of the way, let’s take a look at a few finishing techniques you can use to make your next mahogany piece pop!
There are all kinds of stellar ways to finish mahogany. One of our favourites involves all kinds of finishing products: Dyes, wood fillers, topcoats, and more. Today, however, we thought we’d keep it simple with two finishes that take just a few basic products you may already have lying around. Don’t have the products you need to finish your mahogany wood piece? Don’t worry - we’ve got great finishing products in stock for you.
Simple finishes are an excellent choice for mahogany - they allow the grain and natural colour of the wood to shine through. You’ll start by using a wood filler - water-based or oil-based is fine. You’ll probably be able to find a water-based wood filler that’s colour-matched to mahogany. With oil-based wood fillers, you may need to add a bit of an oil-based stain to tint it to the right colour.
You’ll thin down your wood filler with water or oil (depending on whether you’re using a water or oil-based filler), then apply it to your mahogany. With water-based filler, you’ll scrape off the excess, sand down your piece, then apply more filler if necessary. Oil-based fillers are similar, though instead of scraping off excess, you simply wipe it off.
Once you’re done, use almost any finishing product you’d like - shellac and lacquer are two great choices. Sand between each coat of finish you apply, and you’ve got yourself a beautiful mahogany surface! Simple but effective.
Rubio Monocoat offers a number of products that can finish and protect your mahogany piece. We recommend trying their Oil Plus 2C Colours line, which offers a mahogany coloured finishing oil that can really make your piece pop.
To apply Rubio Monocoat, prepare your wood very carefully. Any sanding flaws become readily apparent when using Rubio Monocoat, so you’ll need to do a thorough job. Between grits, we highly recommend water popping (wiping the surface down with a wet shop towel). Then, inspect every inch of your mahogany to look for sanding flaws.
Once you’ve finished sanding your piece, blow off any excess dust with compressed air. Rubio recommends using their Raw Wood Cleaner to remove any stubborn dust, but you can also use mineral spirits - they seem to work just as well.
Now that the sanding and cleanup process is complete, it’s time to apply your Rubio Monocoat. Follow the instructions on the product in order to mix it. From there, apply it to your mahogany with one of Rubio’s Applicator Pads (or some other tool, like a trowel). We recommend applying the product in sections if it’s your first time. Rubio works quickly - you apply the oil, let it sit for 3-5 minutes, then immediately wipe off the excess with a shop towel. You’ve got a window of about 10-15 minutes to remove excess - if excess oil sits for longer than 15 minutes, it can ruin your project.
Once you’ve coated every part of the surface of your mahogany with Rubio Monocoat, perform a final, thorough wipedown with a shop towel to ensure all excess is removed. Full cure time takes about 5 days, but under ideal conditions your piece can be lightly handled within about 24-36 hours.
Looking for more tips and tricks on how to finish mahogany (or any other kind of wood)? Let us know - we love to get feedback on our content. Check out our other posts for even more woodworking tips, and check out our online store. We’re constantly adding new products, new wood, and more - we’re excited to see what you’ll make next.
]]>Hardwax oil is gaining more and more popularity in Canada. It’s one of the most durable wood finishes, it’s easy to maintain, and it doesn’t obscure the look of wood like some traditional durable finishes do.
When it comes to hardwax oil, Osmo is one of the most popular names in the game. They’re a German company that has been in business for over 140 years, and they make one of the best hardwax products on the market, the Osmo Polyx-Oil.
That’s just the start of what Osmo has to offer. In this brief guide, we’re going to take a look at some of the products that Osmo has available and why they’re special. By the time you’re done, you’ll understand why we love telling our customers whenever we have new Osmo products in stock at our lumber store in Ottawa.
Osmo has gone out of its way to ensure that its products are user-friendly, saving time and labour. One of the most notable examples of this is their popular Polyx-Oil. With most traditional hardwax oils, buffing is an essential step. Not with Polyx-Oil - there’s no buffing required, and the application is simple.
All of Osmo’s products follow this same easy-to-use philosophy. They have oils that are specially formulated for certain projects, like finishing cutting boards. And all of their products are extremely durable, which means you’re less likely to need to reapply Osmo products. They also help to ensure that your project is easy to maintain once it’s finished.
From cutting boards to kitchen tables, woodworking and food go hand-in-hand. That’s why it’s important to be sure you choose a finishing product that’s food safe. Osmo makes this easy - almost all of their products are food safe.
One of the reasons you can eat from surfaces finished with many Osmo products is that they’re made from natural oils that are low in VOCs. You’ll see ingredients like sunflower oil and soybean oil or waxes like carnauba and candelilla in many Osmo products. That means you and your family can breathe easy, knowing that you’re using renewable, non-toxic finishing products for your wood pieces.
Not looking for a finishing product? Osmo also offers cleaning products, application tools, and more.
We have quite the assortment of different Osmo products available - and we’re constantly getting new supplies in stock, like their Wood Wax Finish, which combines the benefits of both oil and wax products. We think you’ll really like what we have in stock - buy Osmo products here.
]]>
We love highlighting our favourite brands - it gives people who are new to woodworking a great starting point, and it allows those who are seasoned pros to get a better look at the variety of different products we have available.
Today, we’re looking at Chill Epoxy. Epoxies are incredibly useful in the woodworking world, for everything from filling in knots and voids to creating incredible finishes on tables. Epoxies are clear, but additives can be used to colour them. With all of the great things you can do with epoxies in mind, here’s why we love Chill Epoxy:
Chill Epoxy offers some of the best epoxies available on the market anywhere. There are a lot of epoxies that come with solvents mixed in. Those epoxies release VOCs, which can be harmful both to the environment and to your health. Solvent-based epoxies are often less durable than their 100% epoxy cousins, too.
Chill Epoxy’s line of epoxy products are all 100% epoxy resin - that means no VOCs, and added durability, strength, and longevity.
The epoxies offered by Chill are also easy to mix, heat resistant, and impact resistant. In other words, if you want a woodworking project to last you for life, and you want to use epoxies in the project, Chill Epoxy is the way to go.
You don’t have to get colour-infused oil with Rubio. The Pure Plus 2C is untinted, so it simply brings out the natural colour of your wood. The Natural Plus 2C is tinted with white and yellow tones - it’s barely there, but some people find it enhances the colour of wood in subtle, warm ways.
Of course, if you don’t feel like going with a more natural look, you can opt for a bold colour, like Ruby or Sapphire. You can even mix Plus 2C colours together to create custom colours.
Best of all, Oil Plus 2C has absolutely no VOCs. There’s no water, no solvents - just linseed oil. It cures incredibly quickly - just 2 days - and within 5 days, you can start cleaning the wood with water and soap.
All of these qualities make Oil Plus 2C an incredible product for almost any wood. Though we wouldn’t recommend it for most outdoor use, it’s suitable for basically any indoor project.
This product is wonderful for refinishing hardwood floors - and with all the colours available, you can go anywhere from rustic to wild with your decor. Rubio Monocoat created a really simple tutorial video on how to do it - we highly recommend checking it out!
We’ll start with UVPoxy (flood coat epoxy) and then we’ll chat about FlowCast (casting epoxy). Click here to jump ahead to FlowCast.
EcoPoxy UVPoxy is a crystal clear durable finish for projects that are ¼” thick or less. This is an ideal professional epoxy for use in high-traffic areas such as bars or restaurants. You can expect a high gloss finish that is UV stable, which means that it has excellent colour stability. UVPoxy can be built up in ¼” layers to obtain the desired thickness of your project. It can even self-level, which is ideal! Here at KJP, we often use this as a flood coat for our custom restaurant table tops. It enhances the durability of the tabletop.
UVPoxy can be combined with liquid or metallic pigments to create any colour imaginable.
Commonly used for:
Step 1: In a dry and clean container, combine 1 part resin with 1 part hardener (by volume)
Step 2: Thoroughly mix for 2 minutes
Step 3 (Optional): Add in liquid or metallic pigment(s) and stir until the colour is evenly distributed throughout the epoxy
Step 4: Pour the epoxy on to your project and spread evenly with a v-notched spreader. If you aren’t pouring on a flat surface, the seal coat is brushed on to your project.
Step 5: Pop any air bubbles by quickly flashing a heat gun or blowtorch
FlowCast can also be combined with liquid or metallic pigments to create any colour imaginable. If it’s not mixed with pigment, FlowCast will result in a stunning liquid glass finish. You can treat this epoxy the same as working with wood: cut with regular saw blades, sand, or turn projects on a lathe.
Commonly used for:
Step 1: In a dry and clean container, combine 2 parts resin with 1 part hardener (by volume)
Step 2: Thoroughly mix for 4 - 5 minutes
Step 3 (Optional): Add in liquid or metallic pigment and stir until the epoxy is completely coloured. Stir for an additional 3 minutes.
Step 4: Pour your mixture into your project. We highly recommend using a reusable no leak HDPE mold. These handy molds have 3” high sides and are welded on a 5-degree angle so once your project is cured - a few quicks taps on the bottom of the form and your piece will immediately release. No release agent needed.
We carry metallic pigments in 30+ colours. Choosing the perfect colour is often the hardest part of an epoxy project. We’ve simplified this headache by offering 3 different packages of 10. This also saves you money!
Here are some popular products that are often needed for epoxy pours:
And that wraps up everything you need to know about UVPoxy and FlowCast by EcoPoxy. We encourage you to browse our Instagram and Facebook pages for endless inspiration. You’ll see a lot of river tables on there, and if you’re interested in making one, we can teach you how to do it! We’d love to have you join us, so click here for our upcoming workshops. You can also view all our Exopoxy products here.
Woodworking is a wonderful hobby for people who love to experiment and tinker - there are so many different products and tools available, and each of them can help you with a different project.
Starbond is an incredibly popular brand of CA glue with woodworkers, and they use it in several ways. We have a variety of Starbond Premium Super Glue products in stock at any time, so you’ll always find the right glue for your project on our site.
We might be getting a bit ahead of ourselves, though. Let’s take a look at what CA glue is, how it can be used in woodworking, why we like Starbond so much, and which Starbond products might be right for your project.
Now that we know what CA glue is, we can take a look at how it’s used in woodworking.
The product you’ll choose will, of course, vary depending on your needs! The Super Fast Thin Glue, for example, works great as a finish or for bonding hairline cracks.
For filling in knots and voids, as well as bonding larger cracks, the Medium Thick Black and Brown glues are a great choice - and the option between the two colours gives you aesthetic flexibility.
For large voids and gaps, go with the Thick CA - it’s called the gap filler for a reason.
You can also get your hands on a wide variety of accessories for your Starbond glue. The Accelerator speeds up the bonding time, so the glue cures fully in seconds - while Starbond glue only takes seconds to work, the thicker glues can take some time (without the accelerator) to reach maximum strength.
There are also micro tips to make applying Starbond products easier - perfect for when you’re dealing with hairline fractures and hard to reach areas. Finally, there’s the Debonder, for when you’ve made a mistake. For those prone to glueing their fingers together, the Debonder is a must.
As you can probably tell, we love Starbond products - that’s why we have so many different kinds in stock! Take a look at what we have to offer, and if you have any questions at all, don’t hesitate to get in touch with us.
Watch Vic Tesolin chat about the top 3 ways to use CA Glue.
]]>
Mr. Cornwall’s Super-Duper Everlasting Oil - Light
Its Typical Coverage when used properly: Approximately 20 square feet per ounce.
9 oz jar average coverage on wood is typically 180 sq. feet
32 oz jar average coverage is typically 640 square feet
Mr. Cornwall’s Super-Duper Everlasting Oil - Dark
* FOR INTERIOR USE ONLY
Click here to register for any of our workshops.
]]>
Or you could eliminate all those steps by using one of our re-usable no-leak epoxy resin molds!
Use our epoxy resin calculator below to get a relatively close measurement of the amount of epoxy you will need.
Now that you know how much epoxy you need for a river table, shop for the materials you need from KJP Select Hardwoods today. We carry a wide variety of epoxy resin perfect for any project! We also offer a large selection of live edge slabs ready to ship that are perfect for river tables.
]]>You have planned your approach. You have sanded and prepped your wood. Now you are ready to finish it. Let's show you how to apply Odie's Oil!
1 - Apply the Odie’s Oil finish with a brush, abrasive pad, (steel wool or other), your hands, or a rag. Almost any applicator will work! When applying Odie's Oil, always rub the finish into the surface. This will push the special formulation of oils and waxes into the wood surface, thereby activating the wood fiber to draw in more finish, thus activating the oil and wax, and in so doing, creating a bond between the wood and the oil. Really rub vigorously! The more effort, the better the result! Apply more oil as needed. More oil is needed when the wood absorbs all the oil from the surface. You have applied enough when a light film of oil remains on the surface.
2 - Give the oil a good 30 minutes to sink into the wood. If the surface has absorbed the oil and feels dry to touch, apply more. Repeat the process until the wood is fully saturated. If the work piece no longer absorbs oil and oil remains at the surface of all parts of the work piece, then the piece is fully saturated with oil.
3 - Now that the piece is fully saturated, set it aside and allow the finish to “set up” for at least 40 minutes. You can wait longer, up to 24 hours. Just remember, the longer you wait, the more difficult it will be to buff (results will vary).
4 - After the 40-minute set up time, take a dry and clean lint-free cloth and completely buff the entire surface until all the oil is removed from the surface. Buff vigorously! The piece should feel dry to touch when finished.
5 - Put the piece aside and let it dry 72 hours before use.
Adding Coats For Additional Sheen and Protection
After the first 24 hours of dry time, you can apply a second coat of Odie’s Oil for additional sheen and protection. Just repeat the Odie's Oil application instructions above. You can apply as many coats as you desire.
Both Odie’s Wood Butter and Odie’s Wax can be used as finishes by themselves. They both give their own unique glow and luster.
Using Odie’s Wood Butter To Reduce Checking
Odie’s Wood Butter can be used on wet wood with Odie’s Oil or Odie’s Oxi Oil as a wood stabilizer. When using Odie’s Wood Butter in conjunction with Odie’s Oil, turners can actually turn a wet piece to its final shape and use the Odie’s Wood Butter to reduce checking and movement in the piece. For best results, try the following technique:
1- Turn the piece and apply Odie’s Oil to full saturation without buffing off.
2- Then apply a coat of Odie’s Wood Butter as a topcoat.
3- Set the piece aside out of the sun in a stable environment, until it reaches its EMC (equilibrium moisture content).
4- Finally, reapply a coat of Odie’s Oil, Odie’s Oxi Oil or Odie’s Super Penetrating Oil to reactivate the finish and buff the residual finish off to the desired sheen.
Odie’s Wax as a Top Coat
All Odie’s Wood Finishes can be top coated with a coat of Odie’s Wax for extra sheen and extra protection!
For Added Sheen and Protection
Add a coat of Odie’s Wood Butter or Odie’s Wax after the initial application of Odie’s Oil or Odie’s Oxi Oil to increase sheen and protection. Odie’s Wood Butter and Odie’s Wax are applied basically the same way. Just follow the previous instructions. Add as many coats as desired.
A Layering Trick For an Even Higher Luster
Wait at least 24 hours for your application of Odie’s Wood Butter to dry and add another light coat of Odie’s Oil or Odie’s Oxi Oil, but buff out this coat immediately (no set up time). This will give the piece a bright, high luster wet look! The purpose of this last, light coat of Oil is to level out the previous coat of Odie’s Wood Butter. You can use the same process with the wax.
Get a Wet, Glossy Look with Odie’s Super Penetrating Oil and Odie’s Wood Butter
To achieve a wet and glossy look, use Odie’s Super Penetrating Oil over Odie's Wood Butter. It levels out the previous coat of wax to achieve that ultimate shine.
A Time Saving Trick
For another way to finish with Odie’s Oil and get a higher sheen than just a coat of Odie’s Oil, but without the wait of the previous tricks, try the following technique:
1- Apply one heavy coat of Odie’s Oil, Odie’s Oxi Oil or Odie’s Super Penetrating Oil and then immediately apply Odie’s Wood Butter in the same application.
2- Work this slurry of Odie’s Oil and Wood Butter into the wood surface. Try to get as much as possible to absorb into the wood. Once again, if the surface starts to feel dry, add more of each product until the wood fiber is completely saturated.
3- Wait the 40-minute set time or longer and VIGOROUSLY buff the surface COMPLETELY clean and dry to touch.
4- Let the piece dry for 72 hours before use. This process will give a higher luster than the Odie’s Oil alone application, but usually not as much as the layered Oil/Butter or Wax then Oil approach described in the previous tricks.
A Note About Friction Polish and Buffers
All Odie’s finishes can be used like a friction polish, and all Odie’s finishes can be used with mechanical buffers. In fact, the friction and heat caused from the lathe or mechanical buffer will speed up and enhance the application process. In most cases, the work piece can be buffed out to its final polish immediately after applying because the heat caused by friction shortens the set up time.
A Reminder About Oil Soaked Rags
Warning: Oil and Solvent soaked rags are combustible. Please dispose of rags in a sealed container.
Odie’s Oil Wants You To Flourish
All of the Odie’s products are made to work together or alone. With this flexibility, you are allowed to customize your finish, and you are given the freedom to create a project that is uniquely yours.
We can only give tips on how to achieve different results, but in your hands, you can take it to any level desired. It’s the easiest finish to use and get great results. Odie’s Oil is a finish that brings out the true artist in everyone!
Now that you’ve read our Odie’s Oil instructions, you have the knowledge and ability to put the perfect final touch on any project. At KJP Select Hardwoods, we don’t just carry Odie’s Oil, we also offer a wide variety of finishing oils and other wood finishing products. We’re your one-stop shop for all of your finishing needs.
]]>
Rubio Monocoat Oil Plus 2C is a next-generation product that colours and protects your wood in 1 single layer. It is an incredibly easy-to-use wood finish and after reading this article, you will feel confident to give it a shot on your next finishing project!
We will answer some common questions including:
On untreated wood, sand until scratch-free without over-polishing the surface. You will want to sand the surface to a minimum of 120 grit, but do not sand past 220 grit, or the Rubio Monocoat Oil Plus 2C (also known as RMC Oil) will not adhere to the wood fibers properly.
Thoroughly clean the surface to ensure there are no wood particles or dust particles remaining. You will want to start removing the dust with a vacuum cleaner and remove the remaining dust particles using Rubio Monocoat Cleaner when possible for best results. Open wood pores guarantee a long-lasting finish and are essential for the absorption of the oil.
If you don't have the cleaner handy, we strongly recommend moistening the surface evenly with water (water popping) instead.
The combination of the oil (Part A) and the accelerator (Part B) ensures a quick dry, quick cure, and superior protection. You will carefully mix the two components (1 to 2 minutes) with a ratio of approximately 3 units A to 1 unit B.
Rubio Monocoat can be used with or without the accelerator.
Once the cleaned surface is dry, spread out a small quantity of Rubio Monocoat Oil Plus 2C. We find this oil spreader the perfect applicator for this purpose.
It's as easy as simply ensuring that you follow the Rubio Monocoat application method in this article! Sand properly, prepare the wood properly, and remove the excess oil at the appropriate time.
Let the oil absorb. Thoroughly remove all excess oil (cloth or polishing machine with white pad) within 15 minutes. The surface should feel dry.
In a well-ventilated room, the surface can be used 24 - 36 hours after the application. After 5 days, treatment with water and Rubio Monocoat products can be applied.
No, only 1 coat is recommended. That being said, in order to guarantee a long lifespan and protection, the use of Rubio Monocoat maintenance products is imperative.
Rubio Monocoat is an easy and reliable wood finishing product. The moment you start applying Rubio Monocoat, you’ll see the difference! Here are some additional tips to keep in mind when working with Rubio Monocoat:
Transform your woodworking projects with Rubio Monocoat from KJP Select Hardwoods! This top-of-the-line wood finish not only enhances the natural beauty of your wood but also ensures long-lasting protection. Ideal for both amateurs and professionals, this easy-to-apply, single-coat application seals and protects, ensuring your masterpiece withstands the test of time. Experience the difference in durability and aesthetics with Rubio Monocoat today!
There are hundreds of finishes to select from, and trust me... we have tried many! We can't seem to find anything we like better than Livos so that's why we carry it.
Kunos by Livos is an oil based, environmentally friendly, wipe-on, low-odor German product. It is pretty much fantastic all around. Here is a link to the Livos website if you are interested in more related information.
Here are some "tips and tricks" that we have discovered finishing dozens of different wood species. Every wood can take finish differently so a test piece is always recommended. Now remember, we are not finishing experts by any means. These are just a compilation of tips that have worked from our experience as well as helpful tricks passed on from our customers.
Recommended Materials:
- sand paper in grits up to 400
- lint free cloths (an old lint free t-shirt will do the trick also)
Other:
- coffee maker
- lamp
Step 1:
Make a coffee
Step 2:
Grab those leftover coffee grounds and put them in a dish to dry them out. (only applicable for woods with voids such as natural edge lumber, spalted woods etc. For that type of project, read this post before continuing.
Step 3:
Sand, sand, sand. Proper lighting is key. Imperfections will not be visible until the finish is applied so take the time to sand properly. Generally speaking, sand no higher than 400.
A helpful way to view sanding marks is to move your lamp to create a cross light.
Step 4:
Make sure you did a good job on step 3.
Step 5:
Mix contents properly with a stick. Wipe on a generous first coat of Livos using your lint free cloth. After 15 minutes, use a new cloth and wipe/buff off all the excess oil. Wipe until the cloth
is dry and no shiny spots remain on the wood. You may have to use more than one cloth. Let sit to dry for 24hrs.
Some people prefer using a brush, particularly for natural edge woods or woods that have density variations.
Step 6:
Apply a coat of Livos. After 15 minutes, grab a clean cloth and buff the finish into the wood. Ensure all excess oil has been wiped off.
Repeat steps 5 & 6 a minimum of one more time... the more coats, the glossier the effect.
For tabletops and projects that need extra durability, we recommend 4 coats.
Important: Livos recommend the following: KUNOS 243 and 244 oils take approximately 30 days to dry thoroughly. Maximum endurance is reached after 4 weeks. Please take the necessary precautions during this time.
As with any oil product, make sure to use caution with your rags.
]]>
Measurement of kiln dried lumber
Net Tally: The actual board feet of KD lumber measured after kiln drying. All lumber sold at KJP uses Net Tally counts unless specified clearly as Linear Feet
Gross Tally: The actual board feet measured before kiln drying. Because of the shrinkage in the kiln drying process, the buyer can expect to receive approximately 8% less BF
Surface Measure (SM)
To determine the SM (surface area of a board in square feet), multiply the width of the board in inches by the length of the board in feet and divide by 12. The & of clear wood required for each grade is based on SM and not BF.
Lumber Grades
FAS: "First and Seconds" will yield the user long, clear cuttings. Minimum board size is 6" and needs to be 8' or longer. The boards must be at least 83-1/3% clear-wood cutting over the entire surface. Both faces must meet this requirement.
FAS One Face (F1F) : The better face must meet all FAS requirments while the poor face needs to be a 1COM or better.
Selects: Virtually the same as F1F except allows 4"+ wide boards and 6' or longer in length. Most of what KJP purchases is Selects or Better - in this case F1F or FAS.
Number 1 Common : Boards can be a minimum of 3" wide and 4' long. The clear face cuttings only need to yield 66-2/3%. Often a better value purchase if the buyer has time to cut out the clear cutting units on each board.
Number 2A and 2B: Most commonly used for flooring since the allowable pieces are much smaller.
*sections and data compiled from the American Hardwood Export publication "The Illustrated guide to American Hardwood Lumber Grades".
]]>
What does 4/4 and 8/4 etc mean?
This refers to the thickness of the board, measured in quarters of an inch.
Examples:
4/4 - 1" thick
5/4 - 1 1/4" thick
6/4 - 1 1/2" thick
8/4 - 2" thick
10/4 - 2 1/2" thick
12/4 - 3" thick
...